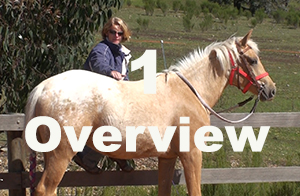
Hips to the Fence - Overview
Hips to the fence is a very useful little lesson - it teaches the horse to stand still while being mounted, saves the horse's back from the damage caused by being mounted from the ground, provides excellent habituation for the less educated horse and is a wonderful demonstration of how to evaluate and control your horse's emotional level.
Training Information
Suitable for: All horses that have been habituated to the bridle
Videos in course: 6
This series shows you how to teach your horse to move his hips to the fence for mounting (or habituation for those horses not yet under saddle).
Purpose
The purpose of this lesson is to teach the horse to move his hips to the fence, or mounting block, for mounting or habituation (being above the horse) before saddling.
It is an interesting lesson in that the horse moves 'into' the pressure and it is often the first time that owners/trainers find it incredibly simple to identify each of the 8 Training Principles.
The Basic Elements:
The SPOT on the horse that you want to move: The left hind foot
The DIRECTION you want it to go: To the left
The MOTIVATION for moving it: Dressage whip tapping the hip
The REWARD given for the correct response: Release of pressure, praise and allow the horse to stand and rest
Pattern
The lesson starts by teaching the horse to move his hips to the left with gently tapping of the dressage whip.
This progresses to cueing the horse to move his hips around to the mounting block or fence using a click of the fingers.
Once the hindquarters can be moved independently of the shoulders, the horse can be taught to side-pass on the ground with this simple cue.
Prerequisites
Bridling
Give to the Bit
While one could, theoretically, teach this lesson in a head collar, it would require a good deal more pressure and likely be considerably less clear to the horse (therefore taking longer to teach and possibly increasing the amount of stress experienced by the horse). For those of you that prefer not to use a bit, your bit-less bridle will be just as effective as a bitted bridle.
Timing
The lesson should take 5-10 minutes with a horse that has done some Kandoo Club lessons before and is familiar with the pressure-release learning steps.
If you have a naive horse it may take a little longer. The lesson does not involve any physical energy but it is important that you get the emotional level correct (see following videos) so that your horse is not mentally tired.
While this is a short lesson, if you think your horse is finding it difficult, you could decide to break it down a little and spread it out over a couple of sessions (perhaps at the end of something else you are teaching).
Things to Remember:
- The lesson will be easy and for the horse if you control the emotional level well - don't put the horse under too much pressure that he exhibits conflict behaviours (see the second video) but be sure to engage the horse so that he is looking for answers.
- This is a great lesson for us as trainers to understand how the training principles work and apply to everything we teach.
- In order to engage the horse, it is necessary to first raise the emotional level; one cannot constantly try to lower the emotional level as it will then be dictated by the horse and the trainer will not learn how to engage the horse. This is discussed in other Club videos but this lesson is often the first time trainers/owners come across it.
ISES Training Principles:
- Release the pressure immediately when the horse responds. You are cueing the left hind to move left. Watch the foot and be sure to release all the pressure (whip tapping and any rein pressure you may have) immediately the horse moves the foot to the left.
- Use signals that the horse can differentiate. This is often taught after the horse has learned Give to the Bit and tapping on the hip means go forward. Try to have your 'move to the left' cue with the whip slightly lower than the 'go forward' so that the horse can recognise the difference.
- Train and initiate responses one at a time (shaping). The first thing we do in this lesson is 'mentally connect' the whip and the left foot. We then shape the behaviour so that our fingers clicking when directed towards the hip cues the horse to move his hips all the way around to the fence (or mounting block).
- Train habitual responses using consistency and repetition. You will find that your horse will learn the pattern very quickly and each time he is lined up at the fence, if you are consistent with your release, he will move his hindquarters to the left. The pressure required, whip tapping, should decrease rapidly until simply pointing at the hip will elicit the behaviour.
- Train only one response per signal. Try to concentrate on that left hind foot. This is the response we are looking for in this lesson. When we go on from here and teach side-pass, it is the rein signal that moves the shoulders.
- Avoid fear during training. This comes back to understanding your horse's emotional level. We need the horse engaged (not bored or falling asleep) but if you put him under too much pressure he will become afraid and as you will be standing close to the front of the horse he may also feel 'blocked'. This situation will get dangerous quickly so be especially aware of this principle and number 8 below.
- Train persistence of responses. The horse learns the pattern - to begin with it is when you raise the whip he moves his hips to the left. Eventually it will be - when you climb up on the fence or mounting block he will move his hips around so that you can mount.
- Check for relaxation. Video 3 will show you an example of a horse that is not meeting this requirement. Watch for conflict behaviours such as kicking, ear pinning or nipping and adjust the amount of pressure you are placing on the horse to encourage him to relax.
 ISES Training Principles Poster
Download your copy of the International Society for Equitation Science's (ISES) Training Principles Poster here.
