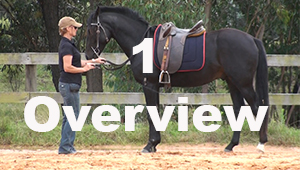
Stops - Overview
This short course will show you how to teach your horse to stop fromm the ground. The lessons are useful for young horses and leading and transfer directly to the saddle for those already started under saddle.
Training Information
Suitable For: All horses (2 years +)
Videos in Course: 3
This course explains how to teach your horse to stop off the rein cue from the ground – making it simple and easy for the horse to learn.
Purpose:
The purpose of this lesson is to teach your horse to stop from a voice cue. The lesson is taught on the ground to make it easier for the horse to learn.
Three cues are given to the horse, the final cue being bit pressure. This gives the horse the chance to learn the pattern and teaches him to stop with the voice cue.
The Basic Lesson Elements:
The SPOT on the horse that you want to move: The left front foot
The DIRECTION you want it to go: Forwards and stop (or pivot)
The MOTIVATION for moving it: Dressage whip tapping the hip for forward and gentle rein pressure for stop
The REWARD given for the correct response: Release of pressure, praise and allow the horse to stand and rest
Prerequisites:
- Bridling and 'give to the bit'. It is important that the horse understands softness in the bridle and travelling in frame (give to the bit work) before teaching this lesson.
- It will be helpful, although not essential, if your horse has done the shoulder control exercises of same-rein-same-foot and reverse arc.
ISES Training Principles:
- Release the pressure immediately when the horse responds. The horse is learning to stop from the rein pressure signal so be sure to release it as soon as the appropriate front foot stops forward movement.
- Use signals that the horse can differentiate. Rein pressure can mean different things to your horse, for example when you open the rein away from the neck it is a turn signal. In this exercise the rein should remain at the same angle as it would be if you were riding. This will make it easy to transfer to the saddle and it will be a new cue for the horse.
- Train and initiate responses one at a time (shaping). We begin this lesson by releasing the pressure when the horse stops moving one front foot. We then shape this behaviour and at the end of the lesson the horse will stop moving all of his feet when signaled to stop. At first the horse will disengage his hindquarters and this is an essential step learning to stop (and also very useful later when teaching hindquarter control).
- Train habitual responses using consistency and repetition. Your signal to stop should be the same each time as this will build a habit in the horse. As you repeat this over time your signal will become lighter and lighter.
- Train only one response per signal. This is the cue to stop, not to back up. We teach back up later and the signal is slightly different so that the horse can distinguish the two. We may have additional seat cues to add to this when we are riding the horse and that is fine different signals to elicit the same response - stop your feet in this case.
- Avoid fear during training. Your horse should want to stop and this lesson should progress quickly and uneventfully if you have the emotional level right. If you feel that your horse is fearful it is possible that you haven't done enough of the prerequisite work such as Give to the Bit to habituate the horse to having you working with it on the ground. Simply go back and refresh your Give to the Bit work and begin again with the Stop lesson.
- Train persistence of responses. You are training the horse to stop from a rein signal and you don't want to hold the horse in halt with constant pressure. If the horse moves off before being asked simply signal stop again and offer him another opportunity to stand and rest. The horse will soon learn to wait for the signal to move forward again.
- Check for relaxation. Your horse should be relaxed but attentive. Check for conflict behaviours such as raising his head, swishing his tail, pinning ears and biting or nipping at you. All of these things are good indications that the horse is confused about the lesson and you will need to go back and break it down further for him to help him relax and learn.
 ISES Training Principles Poster
Download your copy of the International Society for Equitation Science's Training Principles poster here.